pip
pip是Python官方的包管理工具,它可以用来安装、升级、卸载Python包。
有关pip的文档和包源,我们可以参考pip官方文档,基本使用参考pip安装包
pip常用命令
安装包
1 | pip3 install <package-name> |
安装特定版本的包
1 | pip3 install <package-name>==<version> |
查看所有已安装包
1 | pip3 list |
卸载包
1 | pip3 uninstall <package-name> |
更新包
1 | pip3 install --upgrade <package-name> |
搜索包
1 | pip3 search <search-term> |
pip换清华源加快速度
临时使用
1 | pip3 install -i https://mirrors.tuna.tsinghua.edu.cn/pypi/web/simple some-package |
设为默认
1 | pip3 config set global.index-url https://mirrors.tuna.tsinghua.edu.cn/pypi/web/simple |
恢复官方源
1 | pip3 config unset global.index-url |
创建一个库并发布到PyPI
这里我使用uv来管理项目。
创建项目
按照GitHub中的仓库管理体系创建仓库,并将项目clone到本地。
初始化项目
由于我要创建一个库,所以初始化时要加入--lib参数。
1 | uv init --lib |
安装依赖
1 | uv add <package-name> |
编写代码
在项目中编写代码,确保代码符合Python的规范。
编写pyproject.toml文件
参考pip官方文档打包一个项目
修改项目根目录下的pyproject.toml文件,用于描述项目的元数据和依赖信息。
其中,project-name为项目名称要与包名相同,project-description为项目描述。
1 | [project] |
使用module-name参数可以实现项目名和包名不同的效果,具体参考uv官方文档build-backend部分。
1 | [tool.uv.build-backend] |
创建workflow
参考uv官方文档GitHub Actions
创建workflow文件的目的是实现自动发布功能,为以后包的更新提供方便。
在.github/workflows目录下添加文件publish-to-pypi.yml文件,用于描述发布项目的工作流程。
文件内容如下:
1 | name: Publish to PyPI |
每当创建一个tag时,workflow就会触发,自动发布项目到PyPI。
添加Trusted Publisher Management
注册一个PyPI账号,选择Publishing,添加Trusted Publisher。
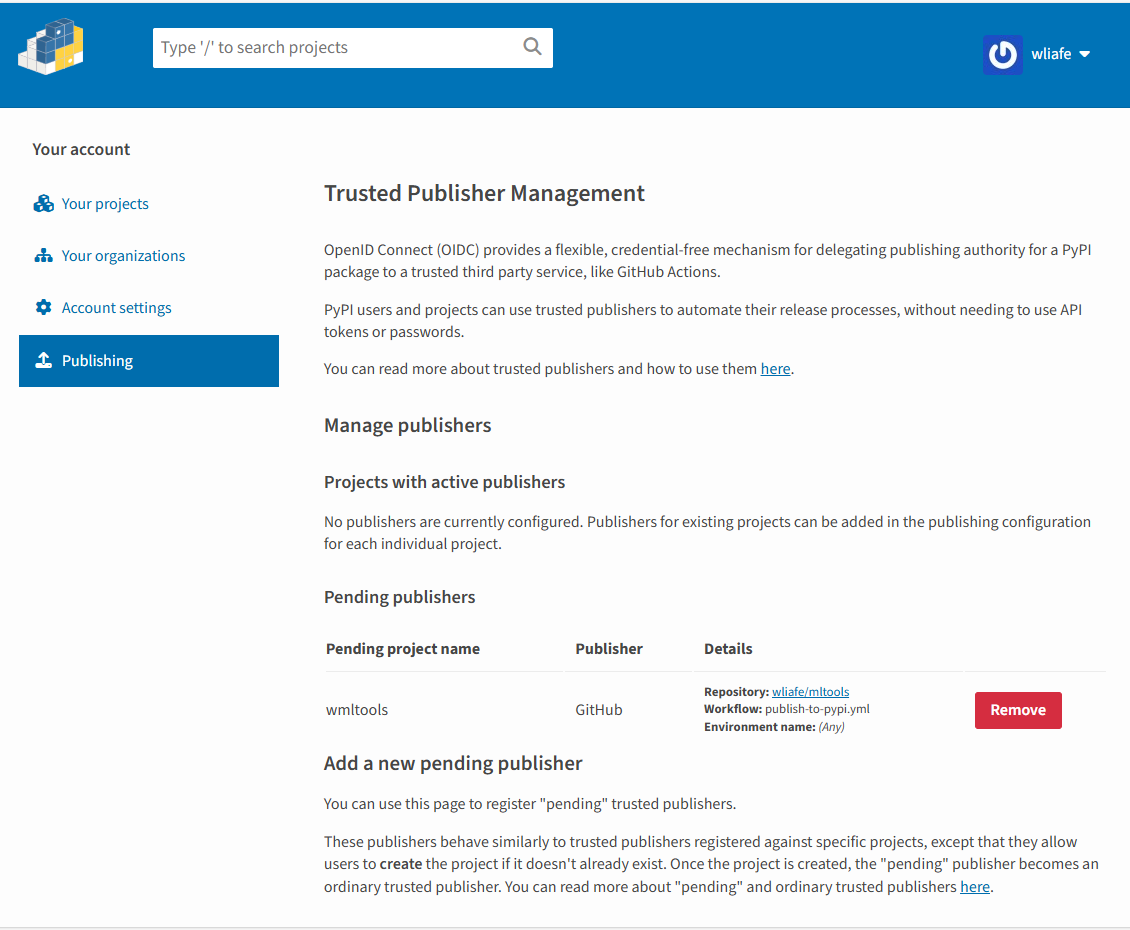
添加GitHub Trusted Publisher。
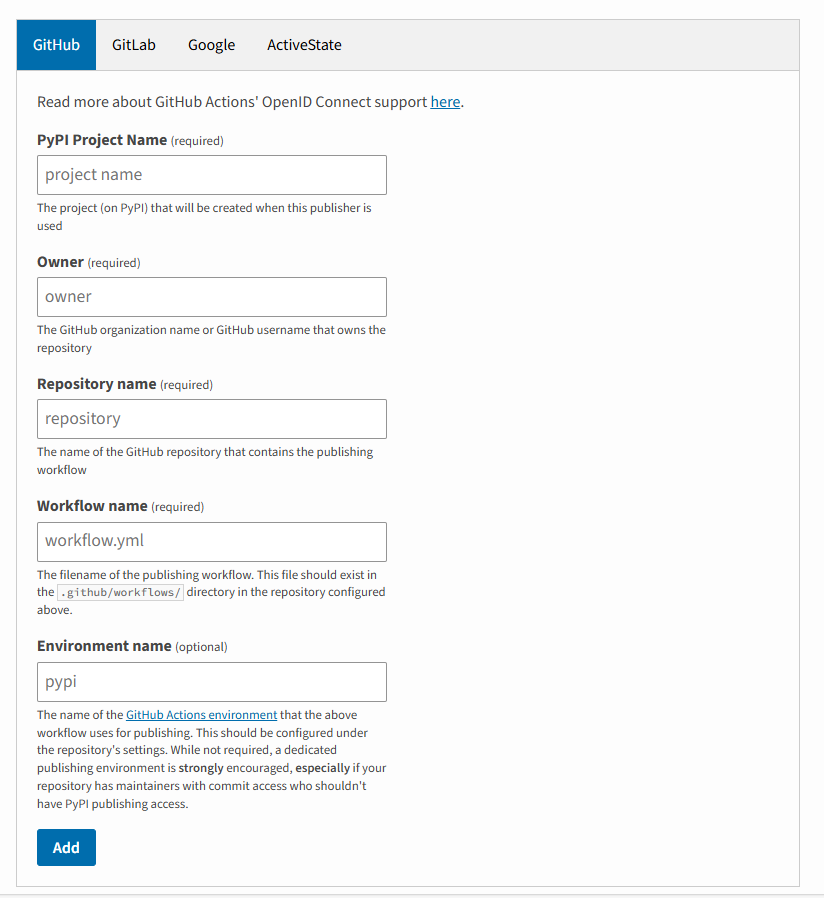
这里最常见的问题就是撞名,没办法,一个一个试吧。
PyPI的包名是不可重复的,而且已创建项目的名称即使删除,上传的项目版本依然存在,如果想要重建,只能使用更高的版本号,所以在创建项目名称和发布版本号时要慎之又慎!!!关于PyPI的包名已存在问题,参考Filename or contents already exists
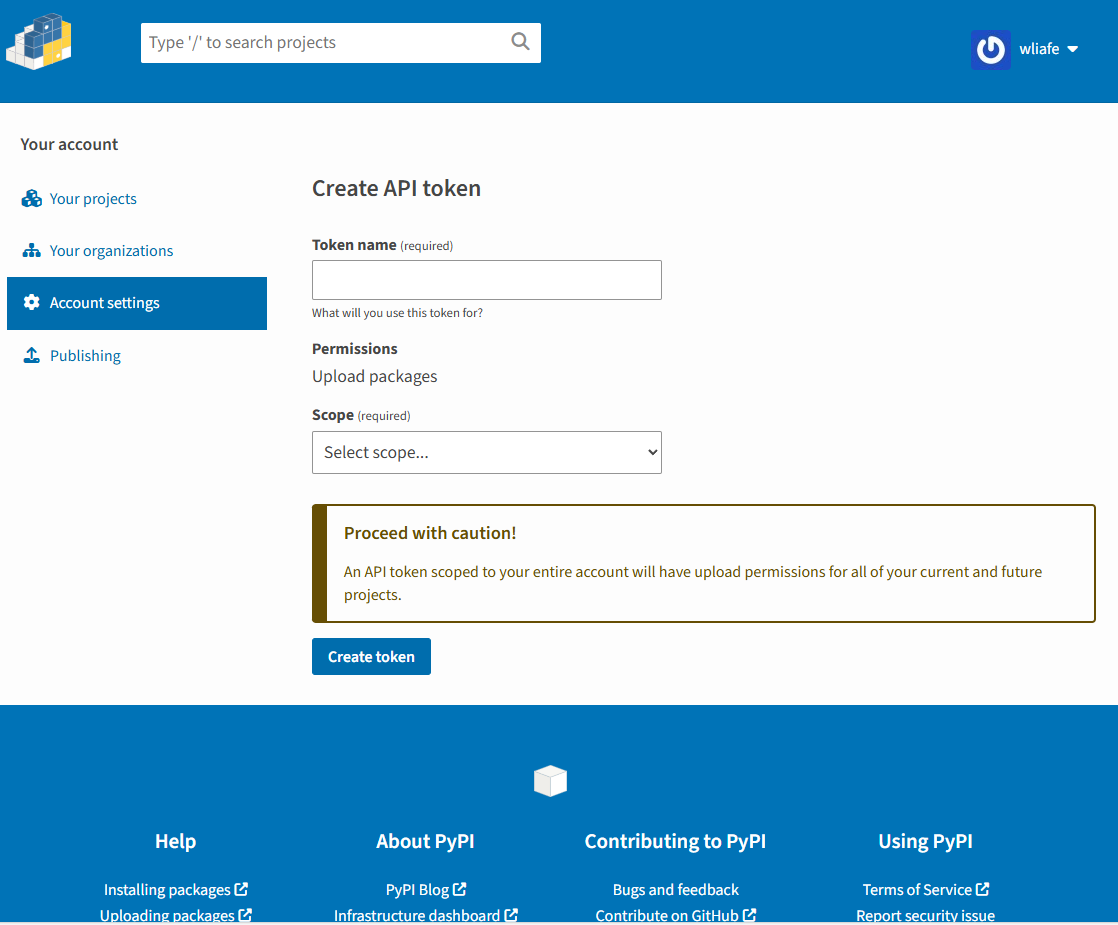
生成PyPI Token
在Account settings中生成token。
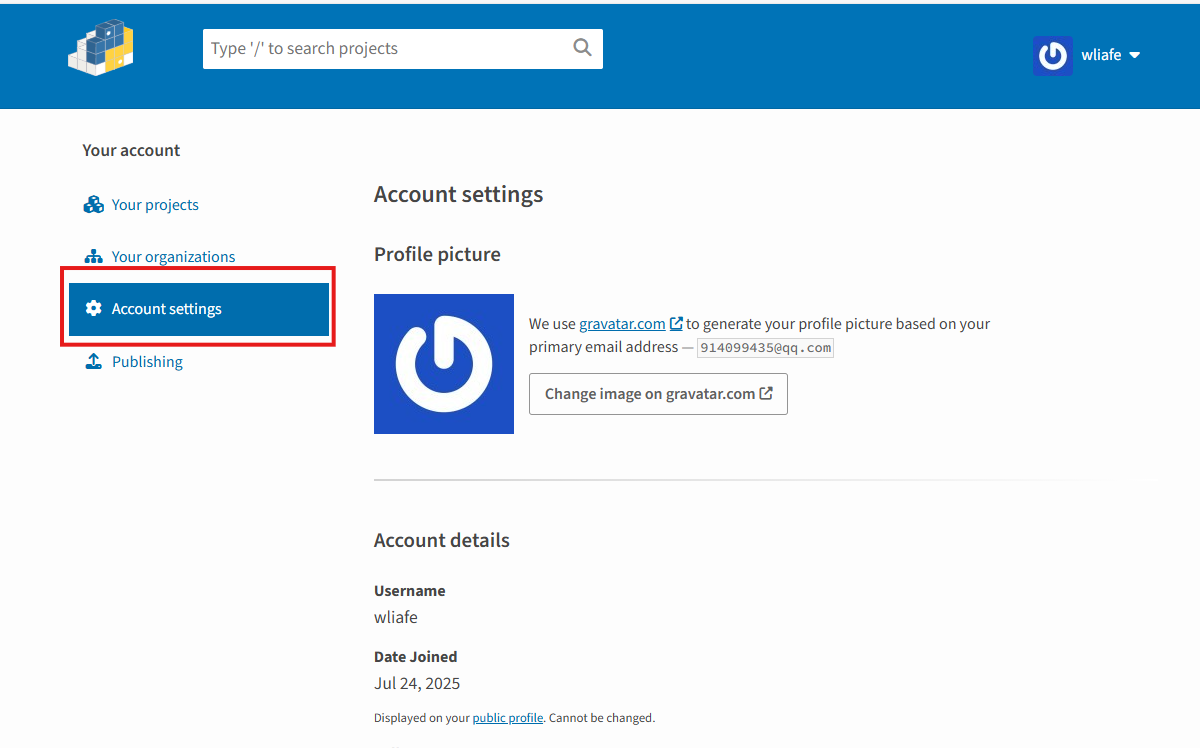
找到API tokens
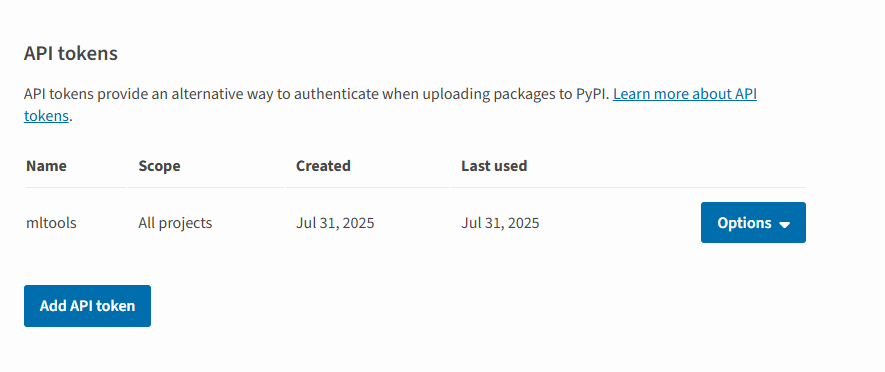
按要求填写表单,生成token。
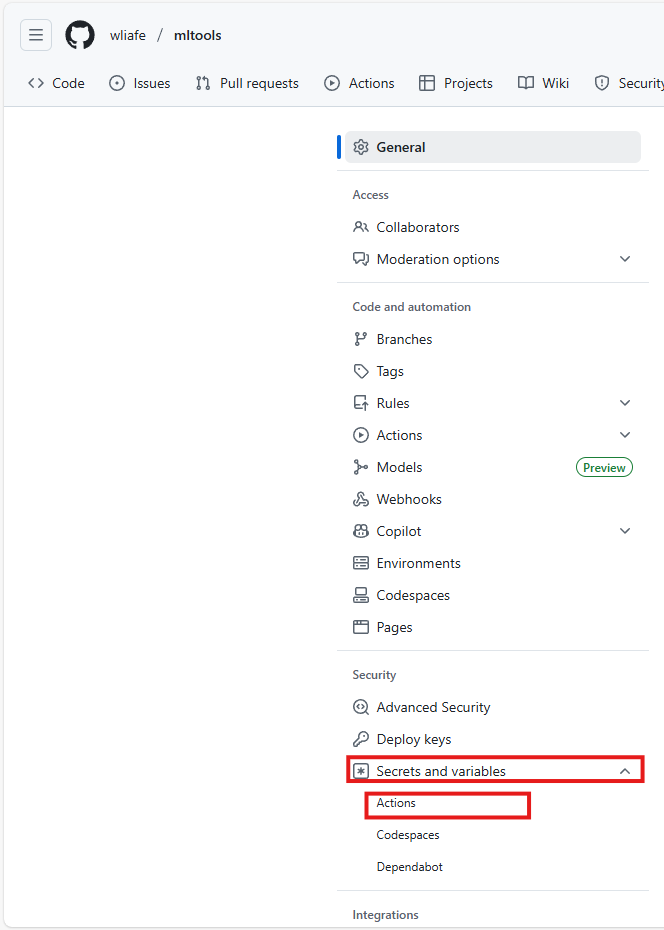
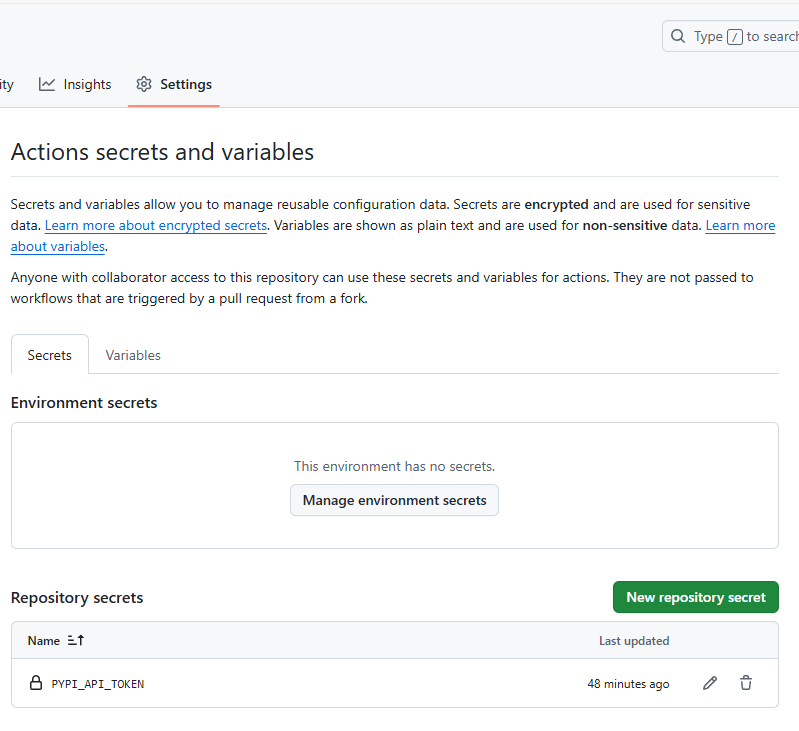
将Token添加到GitHub Actions
在GitHub仓库中,选择Settings,选择Secrets and variables,选择Actions,点击New repository secret。
填写从PyPI账号获取的token。
发布项目
在Gitee中创建一个tag,GitHub Actions就会自动执行workflow,发布项目到PyPI。
给PyPI项目添加文档
我使用的文档工具是Sphinx,我使用的文档主题是sphinx_rtd_theme,我的文档发布平台是Read the Docs。
Sphinx
安装
1 | uv add sphinx |
初始化
1 | sphinx-quickstart docs |
配置
配置项目信息,其中,通过代码获取版本号填入release变量。
1 | # Configuration file for the Sphinx documentation builder. |
添加Sphinx插件。
1 | # -- General configuration --------------------------------------------------- |
设置html主题。
1 | # -- Options for HTML output ------------------------------------------------- |
编写index.rst文件
在.. toctree下面列出自己编写的文档。
1 | .. wliafe-mltools documentation master file, created by |
自动生成API文档
使用sphinx.ext.autodoc和sphinx.ext.napoleon插件根据代码中的注释自动生成API文档。
在conf.py文件中添加插件。
编写api.rst文件,列出需要生成文档的模块。
1 | API 文档 |
将api.rst添加到index.rst中。
使用Markdown编写文档
使用Markdown编写文档,需要安装myst_parser插件。
1 | uv add myst_parser |
在conf.py文件中添加插件。
编写Markdown文件,将Markdown文件名添加到index.rst。
本地构建项目
在项目根目录下执行以下命令,构建项目。
1 | sphinx-build -M html docs/source docs/build |
sphinx_rtd_theme主题
安装
1 | uv add sphinx_rtd_theme |
配置
将主题作为插件添加到conf.py文件中。
将conf.py文件中的html_theme变量设置为sphinx_rtd_theme。
我使用的是主题的默认配置,如果想配置主题,参考sphinx_rtd_theme。
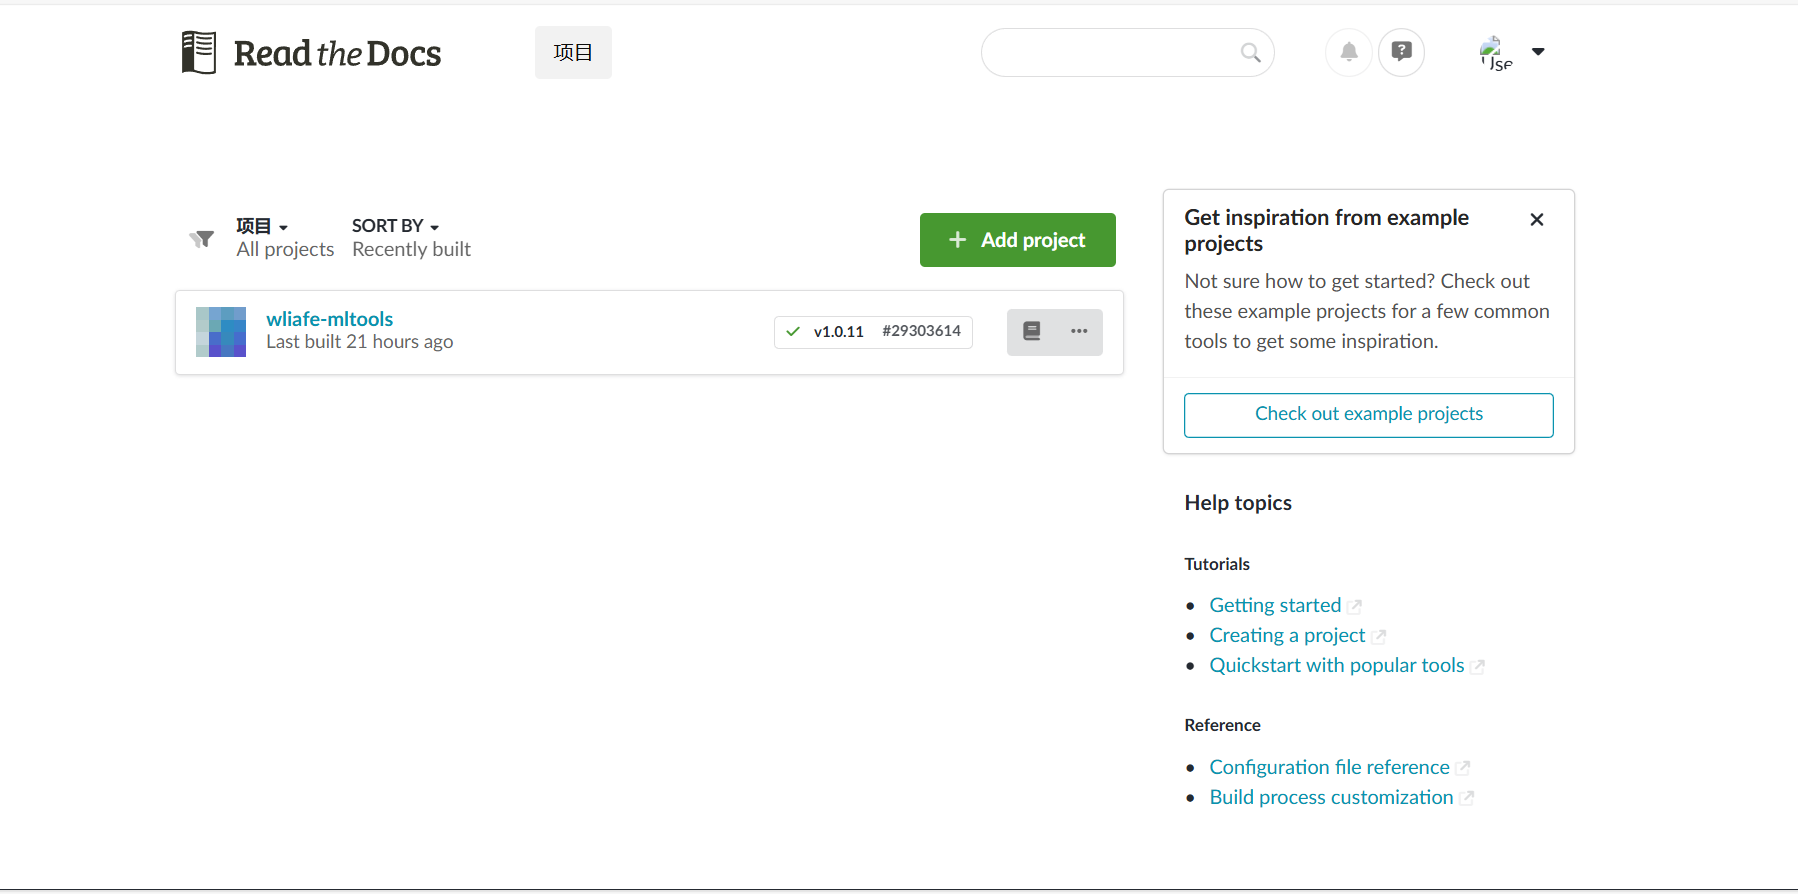
Read the Docs
使用Github注册Read the Docs账号。
点击Add project,填写信息。
在项目中添加.readthedocs.yaml文件用于Read the Docs构建项目。
1 | version: 2 |
.readthedocs.yaml配置文件的requirements选项只支持requirements.txt文件。